Find the two Starfield vendors who sell scan jammers, compare the three jammer models, and learn why your evasion still reads 0%.
What Is a Scan Jammer and How Does It Work?
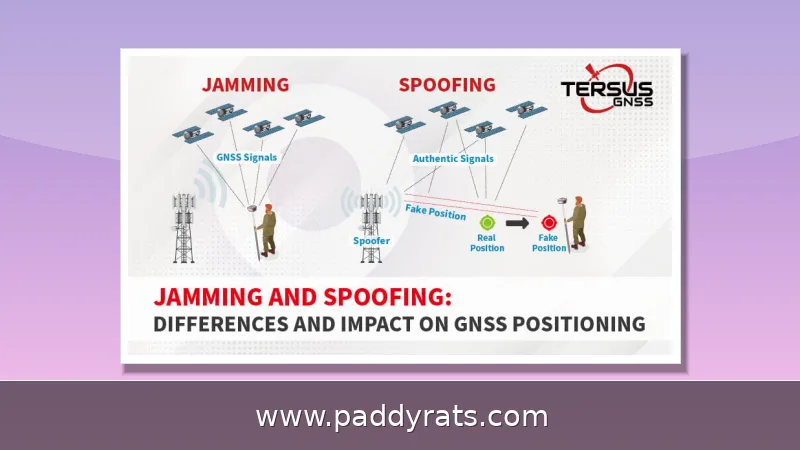
A scan jammer in Starfield is a ship module that messes with the frequencies system authorities use to scan your ship, which makes it harder for them to spot illegal goods in your cargo hold. In practice, that means a percentage-based chance to slip past a contraband inspection instead of getting flagged, boarded, and fined. For any smuggling run, I'd call it the single most important thing to buy, since without one, every shielded cargo module you bolt on is only doing half the job. It doesn't hide your ship or make you invisible, either. All it does is muddy the scan signal just long enough for the inspection to come back clean.
Starfield gives you three scan jammer models to choose from, and they scale in a pretty predictable way: the better the evasion bonus, the more credits and skill investment you're on the hook for. The Single-Frequency model is where most people start — 10% evasion, no skill requirement, 2,700 credits, and a mass of 5. Move up to the Dual-Frequency version and you're looking at 30% evasion, but it'll run you 4,500 credits, weighs 6, and won't install unless you have Starship Design Rank 1. Then there's the Multi-Frequency model at the top of the lineup: 50% evasion, 9,000 credits, mass 7, and a Starship Design Rank 2 requirement. Now, that progression might make you think you can just buy a bunch of jammers and stack them for near-total safety, but the bonus doesn't work that way. This is a common mistake among new smugglers, who figure three jammers means triple the protection. Nope. The game only registers one jammer at a time, and it counts the weakest one you've got installed — so a single Single-Frequency unit can drag down an otherwise solid setup.
Where to Buy a Scan Jammer: Red Mile and Crimson Fleet Vendors
If you're looking for a scan jammer, there are really only two names you need to know, and the good news is that both of them carry the exact same stock. So there's no gameplay advantage to picking one over the other — it just comes down to which location is easier for you to get to, or which one you can actually access based on where you are in the story. The first is Lon Anderssen at the Red Mile on Porrima III, in the Porrima system. His office is tucked behind the Red Mile's front desk, sitting behind a "Ship Services" counter, and it's pretty easy to walk right past on your first visit, so keep an eye out for it. The second is Jasmine "Jazz" Durand at The Key, the Crimson Fleet's base, where she works out of the space service room. She only becomes available as a vendor after Naeva finishes her tour, so if her inventory looks empty or she won't talk business yet, you're probably still early in the Crimson Fleet storyline and just need to progress further before she'll sell to you.
INARA is a community-run database that a lot of Starfield players check before dropping credits on a ship module, and its vendor listings for the scan jammer turn up two more names beyond the usual pair: Kavnyk, the system where Dumar Hasadi does business, and Kryx, where Jasmine Durand runs her shop. That lines up with what I've seen from vendors in-game, since the same jammer stock tends to follow the same seller roster. If you're already flying with the Crimson Fleet, Jazz (Jasmine "Jazz" Durand) is the easier stop — you're docking at The Key anyway, so the trip costs you nothing extra. If you'd rather not get tangled up with that faction, Lon Anderssen at the Red Mile is the neutral pick, and he won't ask you to finish any quests before he sells to you.
Scan Jammer Models, Costs, and Skill Requirements
There are three tiers in Starfield's scan jammer lineup, and each step up gets you a better evasion bonus — but also a bigger credit hit, more mass, and a higher Starship Design rank before the thing will even show up as installable. Single-Frequency is the cheap entry point, Dual-Frequency lands in the middle, and Multi-Frequency sits at the top with the strongest evasion boost, though it also comes with the heaviest price tag and the steepest skill gate. That last part is what usually trips people up. Before you hand over your credits, double-check that you've actually put enough points into Starship Design to equip the better units, because a Multi-Frequency jammer you can't install is just dead weight sitting in the vendor menu. Buying it early doesn't do you any favors either — you'll be out 9,000 credits with nothing to show for it until you grind out that second rank.
| Model | Evasion Bonus | Cost | Mass | Skill Requirement |
|---|---|---|---|---|
| Single-Frequency | 10% | 2,700 credits | 5 | None |
| Dual-Frequency | 30% | 4,500 credits | 6 | Starship Design Rank 1 |
| Multi-Frequency | 50% | 9,000 credits | 7 | Starship Design Rank 2 |
| Model | Evasion Bonus | Skill Requirement | Cost | Mass |
|---|---|---|---|---|
| Single-Frequency | 10% | None | 2,700 credits | 5 |
| Dual-Frequency | 30% | Starship Design Rank 1 | 4,500 credits | 6 |
| Multi-Frequency | 50% | Starship Design Rank 2 | 9,000 credits | 7 |
If you look up the Multi-Frequency Scan Jammer on INARA, you'll see it listed as a Class A module: mass 7, a value of 10,000 credits, a required player level of 16, a 50% scan evasion bonus, and Crimson Fleet as the manufacturer, plus a Starship Design rank 2 requirement. Just keep in mind that 10,000-credit figure is the database value, not necessarily what you'll actually pay at the counter. The price shown in a vendor's ship builder menu and the value recorded in an external database don't always match, which is just how Starfield's economy handles vendor markups and regional pricing. It's also worth knowing that vendor stock is partially randomized, so availability and quantity are never guaranteed. If the jammer you want isn't showing up in the list, don't panic. Wait for the vendor's inventory reset, come back on another in-game day, and check again. On top of that, some modules are gated behind your player level, so a low-level character may simply not see the higher-tier units yet, no matter how many times they refresh the stock.
| Model | Evasion Bonus | Skill Requirement | Cost | Mass |
|---|---|---|---|---|
| Single-Frequency | 10% | None | 2,700 credits | 5 |
| Dual-Frequency | 30% | Starship Design Rank 1 | 4,500 credits | 6 |
| Multi-Frequency | 50% | Starship Design Rank 2 | 9,000 credits (INARA: value 10,000, required level 16, Class A, manufacturer Crimson Fleet) | 7 |
How to Equip a Scan Jammer to Your Ship
Buying the jammer is only half the battle, and it's the step where most players get stuck. Unlike weapons or engines, a scan jammer can't just go anywhere on your hull — it needs a mounting surface, and in Starfield that means an Equipment Plate. Here's the order that actually works: talk to the vendor, pick "I'd like to view and modify my ships" to open the ship builder, then go to the Structural tab and drop in an Equipment Plate before you touch anything else. Once the plate is there, switch to the Equipment tab, select your Scan Jammer, and snap it onto the plate. If the jammer refuses to place no matter where you point it, a missing Equipment Plate is almost always the reason — add one and the module should click right in.
Buying one is simpler than most first-time smugglers expect, but there's still a specific path you have to follow, and you can't skip any of it. Start by talking to the vendor and choosing the dialogue option "I'd like to view and modify my ships." That takes you straight into the ship builder, where you'll hit Add and then open the Equipment tab — the jammer sits in that list next to all the other utility modules, so it's pretty easy to scroll right past if you're not paying attention. Mount it on an Equipment Plate, confirm the build, and pay the fee, and at that point the module is live. I always check the ship stats screen afterward, because a jammer that didn't attach properly won't show any evasion contribution at all — a quiet way to burn credits on a module that's doing absolutely nothing for you.
Why Your Scan Jammer Isn't Working: Stacking and Cargo Tips
Scan jammers do not stack in Starfield, and that single detail trips up a lot of smugglers. If you install more than one, the game doesn't add the bonuses together or even average them out — it defaults to the lowest-rated jammer in your loadout. That means a cheap Single-Frequency unit sitting next to your Multi-Frequency module will override it and drag your evasion down to 10%, which is exactly the opposite of what you paid for. The fix is simple: open the ship builder, delete the inferior jammers, and keep only your best one. Buying multiples wastes credits and piles on extra mass for zero benefit, since every jammer adds weight whether it's helping or not. This one misunderstanding explains a large share of the "my scan jammer isn't working" complaints that pop up in community threads, and it's usually the first thing to check before you blame your shielded cargo or your luck at the checkpoint.
The second common failure is cargo placement. Contraband must sit in your ship's inventory, not on your character. If the illegal goods are in your personal inventory, your evasion readout will show 0% and the jammer will look broken even though it is installed correctly. The third piece is shielded cargo. Pair the jammer with at least one shielded cargo module; one is enough, and adding more shielded cargo does not improve the evasion percentage. Some players report 0% evasion despite buying jammers from the Red Mile, and others report only 62% evasion with several jammers and half-shielded cargo. One source states that jammers can only stack up to a 65% chance of evading inspection, so treat anything near that ceiling as the practical limit.
Alternatives and Backup Plans for Smugglers
If jammer availability is unreliable, the Deception skill is the strongest long-term investment. At higher ranks it can make contraband scans up to 50 percent less effective, but it takes real time and skill points to reach maximum rank, so it works best as a complement to a jammer rather than a replacement. Adding shielded cargo is the cheapest good start, and it costs far less than a Multi-Frequency unit. Some players also recommend selling contraband at the Den, which is a well-known low-risk fence location for moving illegal goods.
The most cost-effective route of all is stealing a jammer rather than buying one. Commandeer a ship that already has a jammer installed, and you inherit the module for free. Crimson Fleet ships are the best targets because their loadouts frequently include scan jammers. There is no system in Starfield to disassemble ships for parts, so the practical workaround is to take a subpar home ship purely for its components, strip what you need, and then sell the stolen craft. It is ugly, but it works, and it beats paying 9,000 credits at a vendor.
Risks, Failure Costs, and What Happens If You Get Caught
Getting caught means arrest and confiscation of your merchandise, and the financial hit can be brutal. One player's worst failed smuggling attempt cost 50,000 credits, which is more than five Multi-Frequency jammers. That number is the reason I never run contraband without both a jammer and shielded cargo, and why I keep my illegal goods in the ship inventory at all times. The scan check happens fast, so there is no chance to shuffle items around once an inspection starts.
A realistic setup looks like this: one Multi-Frequency jammer on an Equipment Plate, one shielded cargo module, contraband stored in the ship, and the Deception skill leveling in the background. That combination gives you a meaningful evasion chance without wasting credits on duplicate jammers. If you are still early in the game and cannot afford the top tier, buy the Single-Frequency unit first, then upgrade once you have Starship Design rank 2 and the credits for the Multi-Frequency model.
Stealing a Scan Jammer from Crimson Fleet Ships
Boarding and commandeering a Crimson Fleet ship is the cheapest path to a scan jammer, and it doubles as a way to farm other useful modules. Target vessels in Crimson Fleet space, disable their engines, dock, clear the crew, and take the ship as your own. Once it is yours, the jammer is already mounted and functioning, so you can either keep the ship or transfer the module to your main vessel through the ship builder.
The catch is that you may end up flying a worse ship just to keep the jammer. Since Starfield has no ship-disassembly system, the standard workaround is to register the stolen craft, move the parts you want, and sell the hull afterward. Selling a stolen ship recovers part of the registration cost, which softens the expense. If you would rather not deal with the Crimson Fleet at all, Lon Anderssen at the Red Mile remains the simplest purchase, and Jazz Durand at The Key is the fastest option once you are already aligned with the fleet.
Quick Reference: Vendor and Model Cheat Sheet
Keep this short list handy the next time you are standing in a vendor menu deciding what to buy.
| Question | Short Answer |
|---|---|
| Who sells scan jammers? | Lon Anderssen at the Red Mile (Porrima III) and Jasmine 'Jazz' Durand at The Key |
| Which model is best? | Multi-Frequency, 50% evasion, requires Starship Design rank 2 |
| Do jammers stack? | No, the game uses the lowest-rated jammer installed |
| Where should contraband be? | In ship inventory, not on your character |
| Cheapest way to get one? | Steal a Crimson Fleet ship that already has a jammer |
Frequently Asked Questions
Where can I buy a Scan Jammer in Starfield?
Buy one from Lon Anderssen at the Red Mile on Porrima III in the Porrima system, or from Jasmine 'Jazz' Durand at The Key after joining the Crimson Fleet. Both vendors stock the same selection, so there is no downside to choosing either merchant. Stock is partially randomized, so check back on another in-game day if the jammer is missing.
Why is my Scan Jammer not working?
Scan jammers do not stack, and the game uses the lowest-rated one if you have several installed, so delete inferior jammers and keep only the best. Also keep contraband in your ship inventory rather than on your character, and pair the jammer with at least one shielded cargo module. Those three fixes resolve most 0% evasion reports.
How much evasion does each Scan Jammer give?
Single-Frequency gives 10% evasion with no skill requirement and costs 2,700 credits. Dual-Frequency gives 30% evasion and needs Starship Design Rank 1, costing 4,500 credits. Multi-Frequency gives 50% evasion and needs Starship Design Rank 2, costing 9,000 credits. One source caps the practical ceiling around 65%.
Do multiple Scan Jammers stack in Starfield?
No. Scan jammer effects do not stack. Buying multiples only raises your ship's mass and wastes credits, and the game uses the lowest-rated jammer when more than one is installed. Sell or delete the weaker units and run a single high-tier jammer instead.